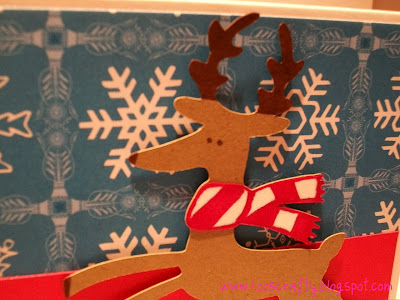
While I have a gazillion things I SHOULD be doing, I opted to take chances and play!!
So happy I did. I tried out a lot of firsts for me and I am smiling ear to ear. The day started out with NO heat, a broken furnace, sick, whining children and 18 degrees COLD outside. YUCK!
I needed to lift my spirits. What better than to make something.

While this isn't the most detailed card, it sure was fun. These are the cards Mason will be taking to school the day of his holiday party. He picked out the image and papers. I just assembled (he was too busy helping plaster in the new craft room, so I let it slide). For the Details:
Recycled notecard from the $1.00 bins at Michaels (when they were 60% off)
Covered the front with some DCWV patterned paper
Reindeer (Jolly Holidays) cut at 3", scarf (layer)
Solid cardstock SU!
Here is the details of all of the NEW things I used or tried.
Bic Fine Point Markers

They come in a great snap shut case. I picked these up at WM the other day. Not really sure why, I just wanted them. I was glad to have them today. So, rather than cut the top layer of the scarf and deal with putting the adhesive on those tiny little cuts I decided to draw on the same image as the cut out showed. I colored in the antlers and hoofs too. I loved how easy it was, and how they covered so nicely.

Teresa Collins Stampmaker

Don't have one?? PUT IT ON YOUR CHRISTMAS LIST!!!!!!!!!!!!!
OH MY! I am so excited over this. It was simple and fast. Best of all I DID IT!!!
The sentiment I used on this card was just simple text written in word. I made a black box and wrote the font in white. Her kit comes complete with the machine, the transparency paper, clamp, and the embossing packs (Imagepak). There is a CD with software to use images on, but since I was only making text, I didn't need to use it. It really couldn't have been more easy, and this was my FIRST time.
Steps to make your own stamp:
- Deign your sentiment, "white" wording is a must inside a black box
- Print with ink jet onto the matte side of transparency paper
- Open clamp by sliding apart (its together with magnets)
- Put the correct size embossing pack down (backwards,) on the clamp
- Lay your transparency over top of it with printed side down
- Place the top of the clamp on and push into the middle to spread out the "goo" inside the pak
- Check both sides for any creasing
- Place your clamp inside the machine (preheated) with the image still facing down
**This is VERY IMPORTANT, too much time with cause the space between wording to harden and too little time will result in tearing of your words or image***
- Remove the clamp and take the pak out to the garbage
- Cut around the image (the red goo will be dripping out)
- At the sink, use liquid dish soap and the included scrub brush to scrub away ALL the unwanted "goo"
- Place into a small plastic bin with water covering the entire stamp
- Back into the machine for 2 minutes
That's it!!! It actually takes about 10 minutes start to finish. Designing to Stamping.
AMAZING!!


3 comments:
fabulous! I see many possibilities with my vector art in Illustrator hmmmm.. Santa needs to know about this NOW! :) :)
cute card, thanks for instructions
I'm so glad you like your stampmaker! I haven't tried it yet but I really need to! You're welcome ;)
Post a Comment